Automatic Notifications
Automatic Notifications
Overview
Automatic Notifications are predefined messages sent by email without any user interaction. Each message has a default template that can be customized.
Types of Automatic Notifications
-
Task Notification:
- Sent as soon as a task is allocated.
- If a task is assigned to multiple people, all users receive the notification.
- Contains basic information about the allocated task.
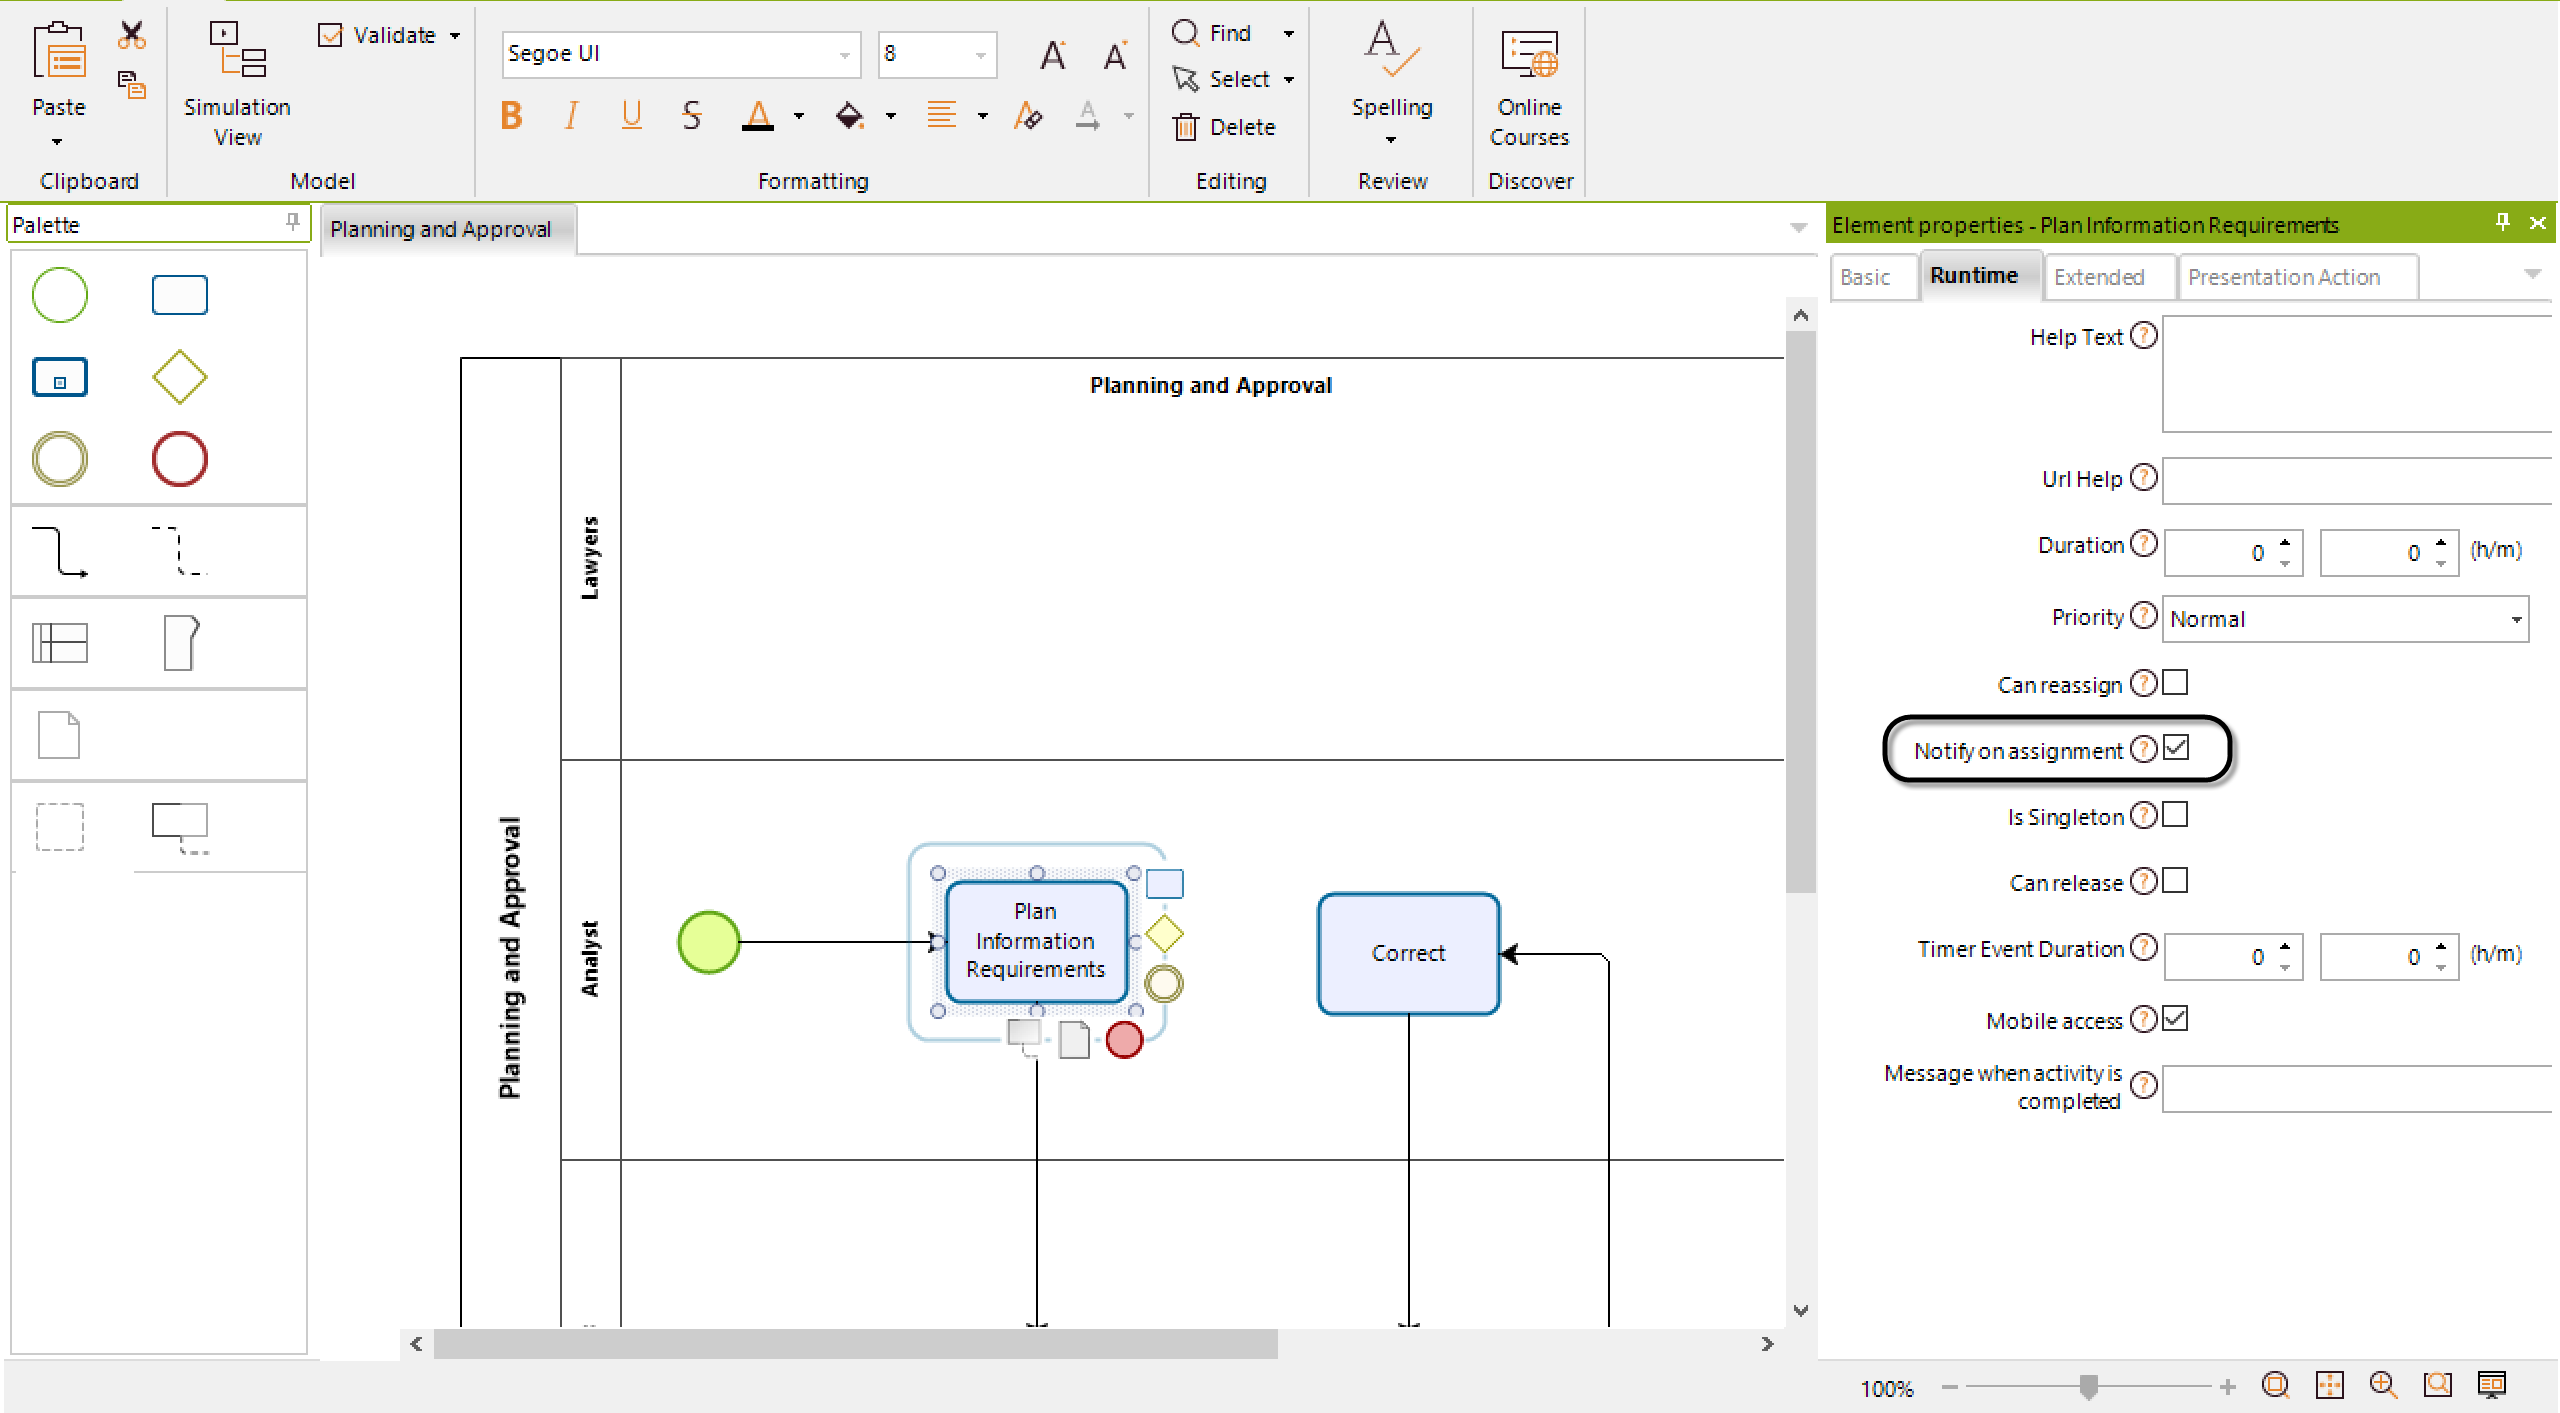
Activation Steps:
- Open the Process model in the first step of the Process Wizard.
- Right-click the Activity requiring a message and select Properties.
- Mark the Notify option to send a message to all assigned users.
- Repeat for all Activities requiring this configuration and save the model.
-
Cancel Notification:
- Sent as soon as a case is canceled to all users currently allocated to the Activity.
- Contains basic information about the canceled case.
-
Task Alarm Notification:
- Sent when an Alarm is configured for a specific task.
- Triggered when a task's duration meets the Alarm's conditions.
- Sent to the allocated user and their boss based on the Alarm's configuration.
Important:
- Task duration must be defined for alarms to work correctly.
- Without a defined duration, Bizagi cannot determine when to send an alarm.
Note:
Activate the Notify by Mail option in the Work Portal for users to receive emails. Refer to Users Administration for more information.
Modifying Automatic Notifications Template
Automatic Notifications have a default template that can be customized. However, no business information can be included because the template is global and applies to all tasks across all Processes in a project.
-
Open Bizagi Studio, go to the Configuration tab, and click Business.
Select the Notifications option from the left panel.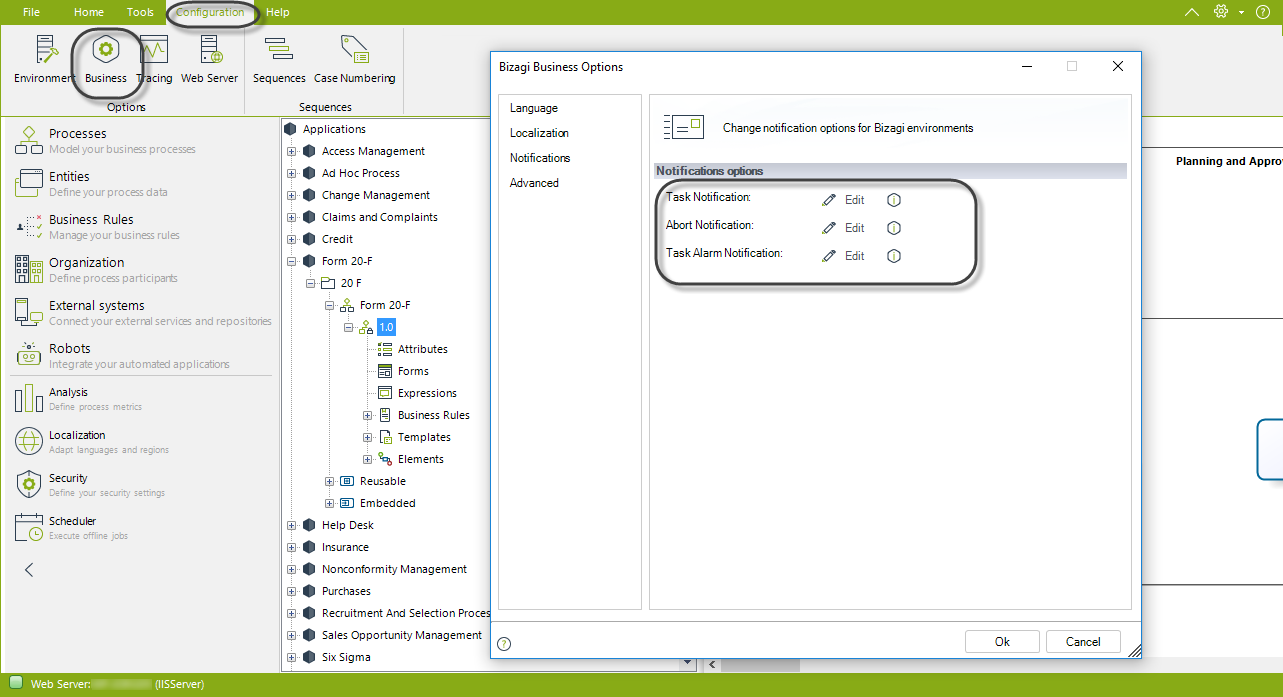
-
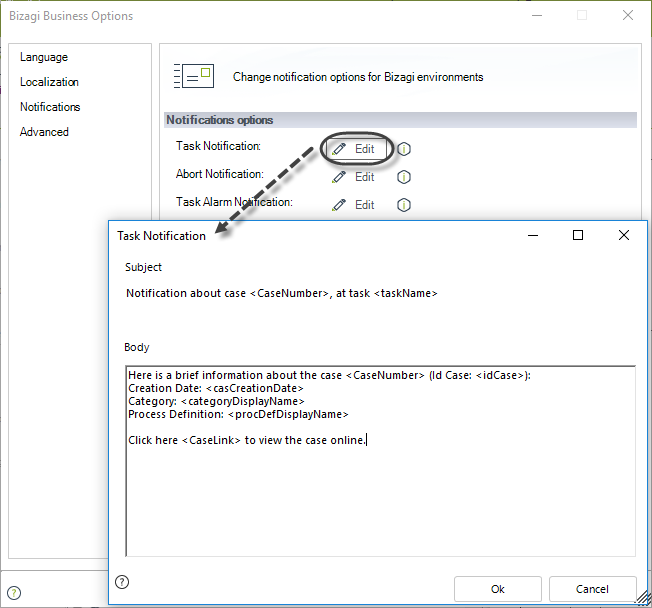
Click Edit to open the default message template.
-
Customize the Display Name and the Body.
- Use the open angle bracket
<to access options like:- A link to the case
- Today's date
- The case creator's name
- Ensure you close the variables with the close angle bracket
>.
Recommendation:
- Do not change the Name of the template.
- The Display Name is what end users see when receiving an Automatic Notification.
When finished, click OK.
- Use the open angle bracket